Welcome to my step-by-step guide on setting up Home Assistant on a Proxmox Virtual Machine! In this video, we’ll walk you through the entire process, from building the virtual machine (VM) to logging in for the first time.
Here’s what you’ll learn:
- How to build the VM in Proxmox
- How to download the Home Assistant image directly to Proxmox
- How to extract and attach the image to your new VM
- How to log in to Home Assistant for the first time
Whether you’re a beginner or an experienced user, this guide will make the setup process smooth and straightforward. Let’s get started!
Z-Wave/Zigbee USB Interface
If you want to add Z-Wave or Zigbee devices to your Home Assistant setup, the following USB interface will provide both. This is what I have used for years, and it is great! Amazon Link: Nortek GoControl USB Z-Wave/Zigbee Interface

Download the HAOS VM Image for Proxmox

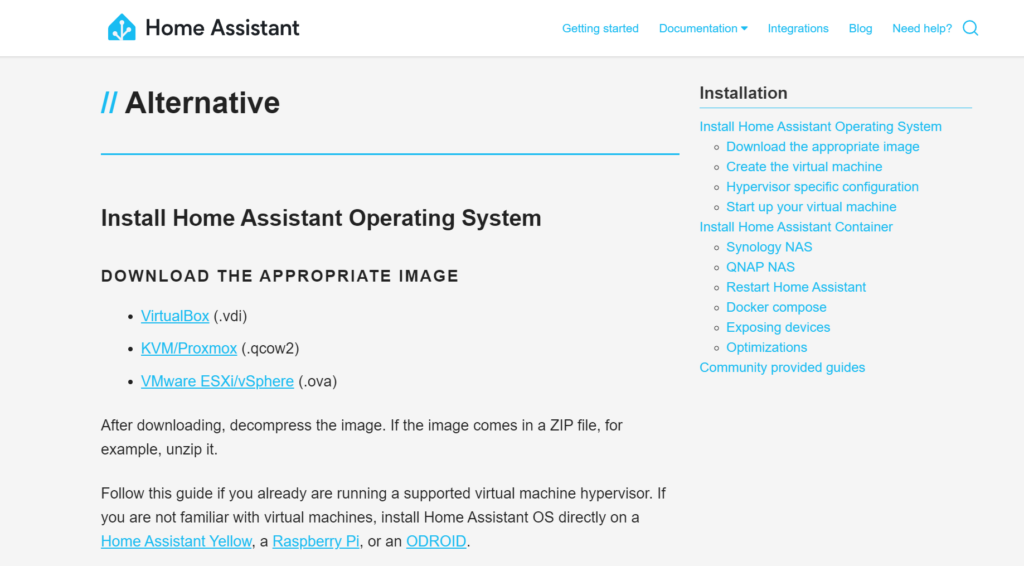
- Head to the Home Assistant Alternative Downloads site and right click and save the link for KVM/Proxmox
2. Open your proxmox shell (not one of your VMs) and type the following and hit enter to download the file:
wget <paste the web address you copied in step 1>3. When the file downloads, you need to extract it using the following command:
unxz <extracted filename>Time to create your Home Assistant VM
- Click ‘Create VM’ and fill out each page with the following detais:
General Tab:
VM ID: – choose an ID number that you are not already using
Name: Give it a name such as ‘homeassistant’
OS Tab:
Select “Do not use any media” because we will be using the file we downloaded above
System Tab:
Machine: Change to “q35”
BIOS: Change to “OVMF (UEFI)”
EFI Storage: Choose your local storage device
Pre-Enroll keys: Uncheck
Disks Tab:
Delete the drive using the trashcan icon in the left column
CPU Tab:
Home Assistant needs a minimum of 2 cores. Set this to what makes sense for your needs, but know that you can adjust it later if needed
Memory Tab:
Home Assistant should have a minimum of 4GB (4096 MiB), so enter that or more. Each GB of memory is 1024, so increment accordingly to get the total GB you want. You can also adjust this later if needed
Network Tab:
The defaults should be fine in most cases, but if you have a VLAN or want to specify a static IP you can do it here if you do not have DHCP assign your static IP. Hit next when you are ready
Uncheck “Start after created” and hit finish
Time to attach the image you downloaded to your new VM!
Back to your hypervisor node shell where you downloaded the file above you will need to import the extracted file into the VM. Use the following code:
qm importdisk <MACHINE ID #> <filename.qcow2> <Storage location>As an example, your command may look like this:
qm importdisk 100 haos_ova-12.3.qcow2 local-lvmSet the VM up to boot to the new disk image
Go to the Hardware after selecting your VM and double click on the “Unused Disk” line item. It should be near or at the bottom
Tick the discard checkbox if you are using an SSD for the storage device and then click the Add button
Now under options choose “Start at boot” and select ‘yes’
Under “Boot Order” uncheck the ‘cdrom’ and ‘network’ options and check the scsi drive that you just attached. This will set the boot device to the HAOS image
Start the VM and Install Home Assistant
Start the VM and watch the shell console until the Home Assistant logo appears. At this point you can log in and configure everything. Use the following address to log in:
http://<Virtual Machine IP>:8123
Now go forth and do great things with your awesome Home Assistant Virtual machine! Congratulations!
