Join me as I embark on the journey of building a Frigate NVR (Network Video Recorder) on a Proxmox LXC (Linux Container) with USB Passthrough for a Coral USB Accelerator!
Don’t miss out on this opportunity to level up your tech skills and build your very own Frigate NVR system. Hit that subscribe button, smash the like, and let’s dive in together!
All supporting files can be found on my GitHub site here:
https://github.com/WhatsNewAndrew/YouTube/tree/main/docker-compose/frigate
Creating the LXC Container in Proxmox
Create your LXC container using one of the LXC templates you have downloaded. If you are unsure how to do this, you can view this YouTube Short to see how it is done!
Fill out the details for your container:

Select the OS LXC template you would like to use based on the templates you have downloaded. Again, see this YouTube Short to see how to get templates.

Set the disk size for your container. If you are storing your video files in the container you will want to size appropriately

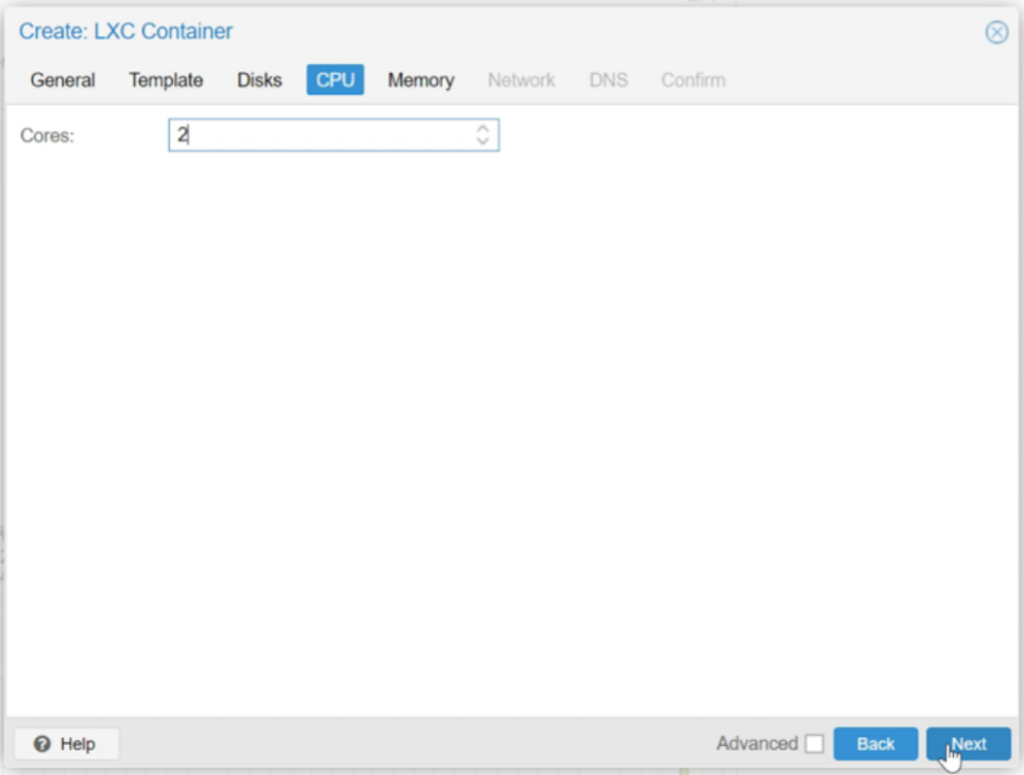
Two Cores is plenty for this since we are using the USB Accelerator to help offload some of the workload:

For Memory, 4-8GB of RAM will be sufficient

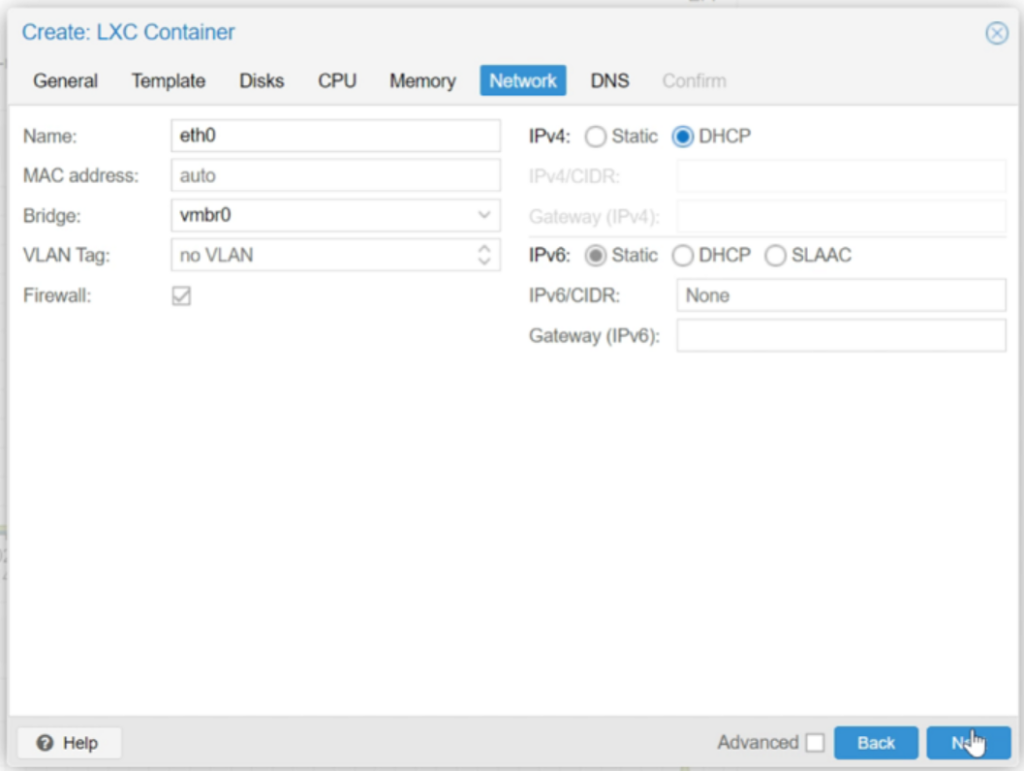
Set up your networking as it makes sense for your infrastructure. I would suggest DHCP initially. This will give you an IP from your router and set up a virtual MAC address

Once creation is done, be sure to run an update on your machine for the latest software updates:
apt update && apt upgrade -yInstalling Docker, Docker-Compose, and Portainer
Install Docker:
apt install docker -yInstall Docker Compose:
apt install docker-compose -yInstall Portainer. First create the docker volume to store the data, and then actually install Portainer:
docker volume create portainer_datadocker run -d -p 8000:8000 -p 9443:9443 --name portainer --restart=always -v /var/run/docker.sock:/var/run/docker.sock -v portainer_data:/data portainer/portainer-ce:latestEditing your fstab File
(Only necessary if you are connecting to a NAS or other remote hardware to store where you will need an NFS mount)
NOTE: If you want to store on a local drive like a USB or an extra internal drive, you can look at this video to see how to expand storage on your LXC
Edit the file with the following command:
nano /etc/fstabAdd the following line to your fstab file based on your setup:
<your-NAS-IP>:/path/to/shared/folder /mnt/<local_folder> nfs auto,nofail,noatime,nolock,intr,tcp,actimeo=1800 0 0Create the local folder that will be used to map the NAS folder (use the same local folder name as above)
mkdir /mnt/<local_folder>Mount the filesystem. If you have an error that says it needs a helper program installed, see the next step:
mount -aIf you receved the error as mentioned, add the nfs-common install to help and then re-run the command above
apt install nfs-common -yUsing ‘lsusb’ to identify your Coral Accelerator for USB passthrough
You need to know where your USB device resides so that you can pass it into your LXC container. To do that you will run the lsusb command and use the results in the next step.
This is done on the Proxmox VE, not the LXC container. Go to your Proxmox VE and then shell to run these commands.
lsusbThe results will look similar to this. Find your USB Accelerator. If you are unsure which it is, unplug and re-run the command above. You will see the one that is no longer there. That is your accelerator.

Optional: Now you want to get any hardware acceleration that is available on your machine. To do that, issue the following command:
ls -l /dev/dri/by-path
Editing the LXC Config File to Enable USB Passthrough
Using the information we got in the previous step, we will need to edit the config file for our LXC container.
This is done in the shell of the Proxmox VE the same way we did the steps above
nano /etc/pve/lxc/<yourLXCID>.conf
The lines you need to add are below. Replace ‘renderD128’ and ‘004’ with the values you found in the previous step for your machine:
lxc.mount.entry: /dev/dri/renderD128 dev/dri/renderD128 none bind,optional,create=file 0, 0
lxc.mount.entry: /dev/bus/usb/002/ dev/bus/usb/002/ none bind,optional,create=dir 0,0
Save the file and restart your LXC container.
Creating and Editing the Frigate config.yml file
The sample config.yml file can be found in my GitHub repo here:
https://github.com/WhatsNewAndrew/YouTube/tree/main/docker-compose/frigate
Use that file as your starting point. You will save it to the following location in your LXC instance:
/opt/frigate/config/config.ymlInstalling Frigate in Portainer Using our Docker-Compose File
The base Docker-Compose file can be found in my GitHub repo here:
https://github.com/WhatsNewAndrew/YouTube/tree/main/docker-compose/frigate
Use that file as your starting point. If you change the path of the config.yml file above you will need to make that update in the compose file as well.
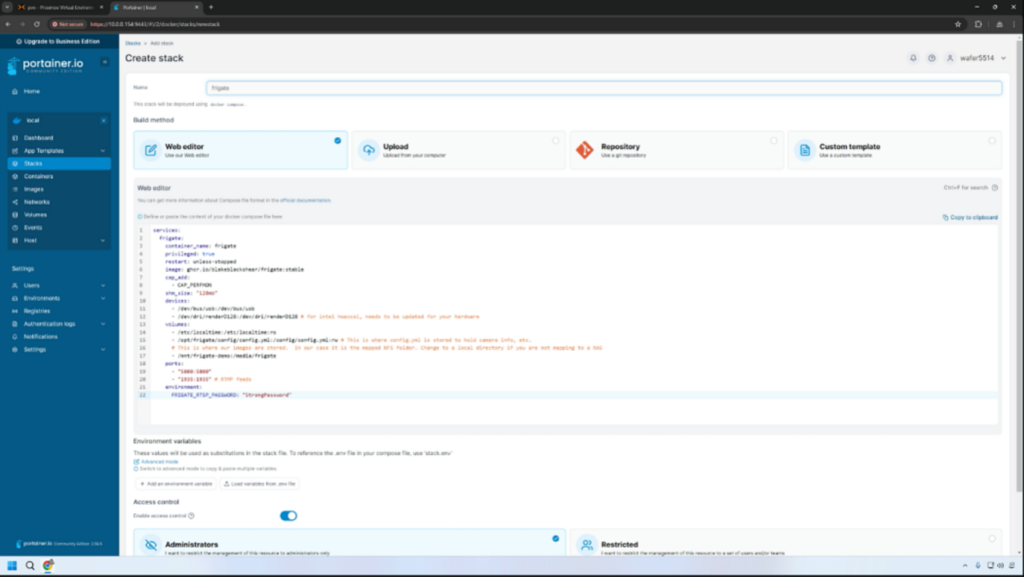
Navigate to your Portainer instance on your LXC container. The address is https://<LXC-IP>:9443. Paste the compose file in a new stack, name it, and hit ‘deploy the stack’

Opening and Using Frigate for the First Time
Navagate to http://<LXC-IP>:5000 to get to the UI. You will be greeted with your camera view! (in this case, my lovely garage door)

That’s it! You now have a running Frigate NVR to use. Add cameras and customize all you want! Have questions? Post a comment in the video or contact me!
